
Handwriting is something that’s all too tempting to fall by the wayside today, as more people are obsessed with the digital. Whether it’s the stylus on their tablets or YouTube videos, folks seem to make less time for old-school things like cursive.
That’s too bad because there’s true artistry and design in something as creative and intricate as handwriting. For designers in particular, it's important to appreciate what it takes to create specific characters — this can only help them when they’re designing new fonts. One of the more interesting ways to familiarize yourself with typefaces in general is learning about handwriting.
For those creative types who want to write cursive much better than they are currently, there’s a very stimulating way to improve their handwriting: It’s the 30-day Handwriting Challenge. Over the space of a month, you’ll learn a new technique or strategy each and every day that will serve you well in your quest to become a master of cursive.
After 30 days, you’ll be able to handwrite so well that your characters will seamlessly flow right onto the paper with only minimal movements of your joints.
Pin this challenge

Ready to give it a shot? Awesome! Here’s what you’ll need to do…
Phase 1 – The Analysis
Day 1: Decide the Reason for Wanting to Improve
We’re all motivated by different reasons for wanting to get better at handwriting. Maybe it’s a purely aesthetic thing for you, or perhaps you want a new, creative challenge.

Still others may want to improve their penmanship because it aids their sense of authority at work, if they’re in a management position. Whatever the reason is, when you understand exactly what it is, you can more accurately and determinedly home in on your goal—like a well-focused laser beam.
Day 2: Look at Your Own Handwriting
Improving your handwriting 101 starts with what you’ve already got, which is how you currently write cursive. Pick a topic, any topic, or write stream-of-consciousness thoughts on a piece of lined paper.

Write a few sentences to form a paragraph. Don’t try to make it “perfect”; simply write naturally so it’s an accurate sample. When you’re done, you can take a step back and objectively start to analyze your handwriting as a starting point.
Day 3: Know What to Look for
Examine the paragraph you just wrote to see where you are exactly with your handwriting skills.
To get a meaningful impression, look for the following attributes and factors in your handwriting:
- The shapes (loops, curves, hard corners, etc.)
- The slant’s degree (the angle in which you write the letters)
- The alignment (upward or downward angle, any overlapping with other letters, etc.)
- The spacing
- The size
- The line quality (hard to read, heavy pressure on paper, etc.)
Day 4: Identify Your Imperfections
On the third day, you have to conduct an honest and hard assessment of the way your handwriting currently looks. No one’s perfect, so chances are great that you’ll spot quite a few mistakes.
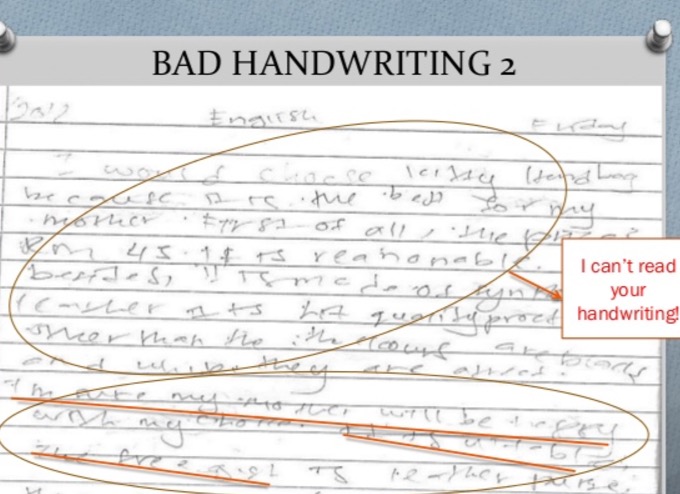
Some ideas of mistakes to look for can include:
- Letters that are too far apart or squished together
- Crooked alignment
- Too steep an angle in your letters
- Letter shapes that are hard to read or even illegible
- Letters that are too faint or pressed to hard into the paper
The Preparations
Day 5: Get the Right Materials to Help Your Cause
Now that you finally have a great idea of what you’ve been doing wrong and what you want to fix, you can begin taking actionable steps to improve.
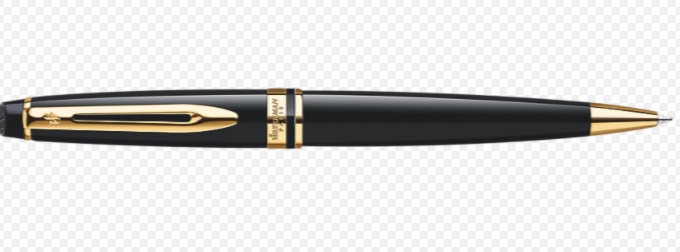
First, start with the very basics: the writing instrument that you’ll be using. Get whatever feels the most comfortable in writing on a piece of paper. This can be a fountain pen, a regular pen, or even just your basic pencil. Then buy a notebook, so you can chart your improvements over the days.
Day 6: Get Inspired by Handwriting That Impresses You
The web is the perfect place for your dose of inspiration. Simply visit typography websites like Google Fonts, Typewolf or our very own Creative Market fonts category to sift through the huge selection of different typefaces and get the inspiration you’re looking for!


The more samples of type you’re exposed to, the more you can figure out how you want to mold and develop your own handwriting.
Day 7: Practice With Air Writing
You’ve heard of air guitar, right? When budding guitar players pretend they’re holding a guitar and jamming out awesome chords and solos? Do the same thing with your handwriting by practicing in the air before you take to your notebook with your writing instrument.

When you “write” sentences in the air with your finger, you’re actually training the complex group of muscles in your hand and entire arm to support you when you’re actually handwriting.
Day 8: Stretch Your Hands and Wrists
While handwriting isn’t a workout, per se, it can eventually take a slight toll on your hands and wrists, if you do it long enough. That’s why it’s a smart idea to start getting used to warming up your hands and wrists prior to every handwriting session.

On Day 7, start the practice of flexing your hands and then rolling your wrists, so they’re limber and loose. Do this prior to handwriting, but also do these exercises on a regular basis, so your muscles will be less likely to tighten up.
Day 9: Learn to Hold Your Pen or Pencil Properly
As with many things in life, the correct form is so important to success at any endeavor, even handwriting. When handwriting, learn to hold your pen or pencil in between your thumb and index and middle fingers.
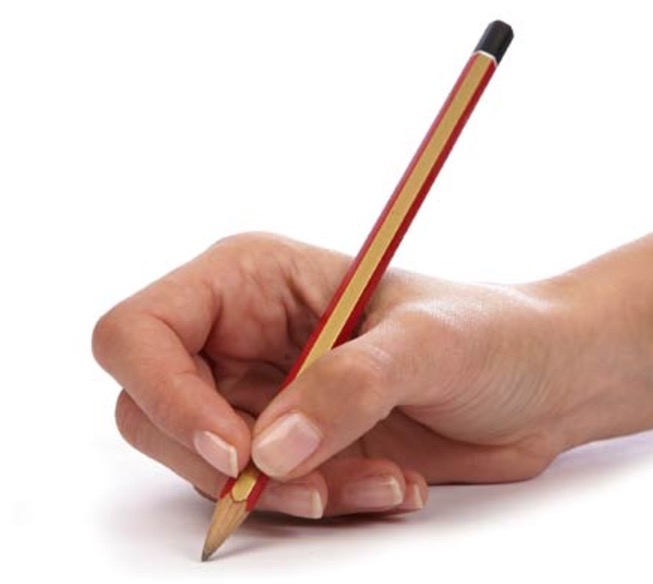
The end of the pen or pencil ought to rest on either your index finger’s knuckle or the web of the hand. Strike the right balance between holding too tightly and loosely for optimal results.
Day 10: Learn Ergonomically Correct Body Posture
How you sit and position your body when handwriting has great impact on how well your cursive looks on the paper. Sit up straight, and then utilize your non-writing hand for balance; this will provide you with more control during handwriting.
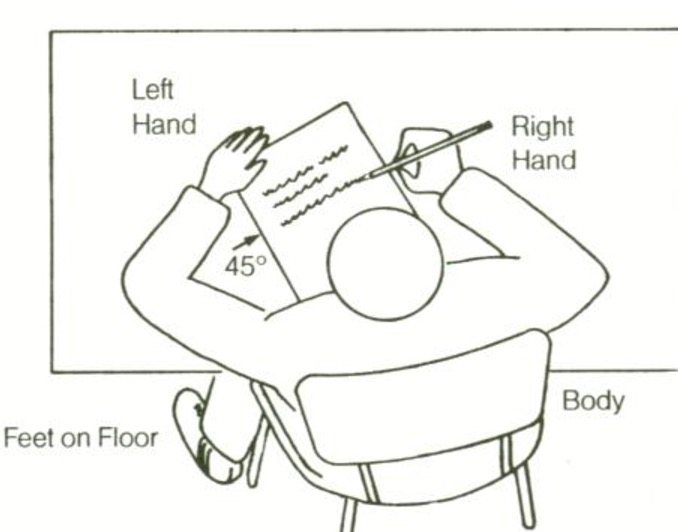
Always sit at a table and a good chair (with a hard back) instead of a couch or other seat with poor back and seat support.
Day 11: Understand That It’s Not About Your Fingers
Now that you’re one-third of the way to your goal, it’s time to retrain your mind: It’s not about the fingers when handwriting. It’s really about using your forearm and shoulder, as professional calligraphy artists already know all too well.

To get in the good habit of this, simply hold your pen or pencil, but write big letters in the air, which will activate your forearm and shoulder more.
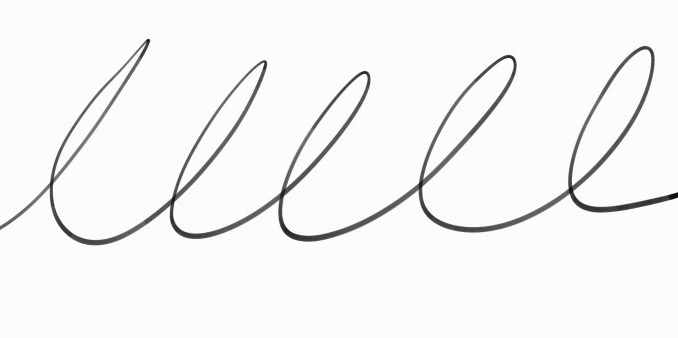
Day 12: Get Familiar With Writing Basic Shapes
The core aspect of handwriting is shapes. Think about it: You’re writing lines and curves and then joining them on line after line.

Before you start forming letters, go back to the ultra basics by filling up your lines with simple vertical and diagonal lines, circles and semi-circles. Only when your basic lines and curves look regular and evenly spaced, then you can move on to the actual letters!
Day 13: Take the Time to Just Doodle
Don’t think that doodling is a good use of your time? Still think that doodling is censurable because you may have been reprimanded for doing so in school? Reconsider the value of doodling to improve your handwriting, however.
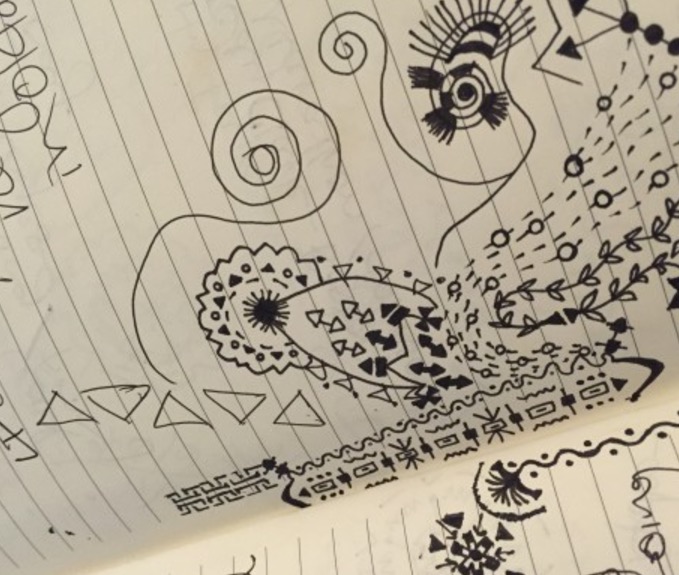
Besides being relaxing, doodling actually helps your hand-eye coordination and gets you in the habit of smoothly moving your pen or pencil across the paper. Don’t believe me? Just try it.
Finally…You’re Ready for the Handwriting
Day 14: Reconsider Your Use of Loops
This is the day when you’re really only ready to start working on your cursive proper. Let’s get to it. Loops tend to hide the shapes of letters since we usually recognize letters based on their tops.
Naturally, you’ll want to keep your use of loops to a minimum to improve your handwriting’s legibility and readability. Should you not be 100% ready to sacrifice your loops, then only keep them around in the lower parts of letters, like the descenders in “p” and “j.”
Day 15: Slant Your Cursive, but Only Slightly
Some folks overdo the degree of slant or tilt they apply to their handwriting. This is a mistake that you definitely want to avoid.
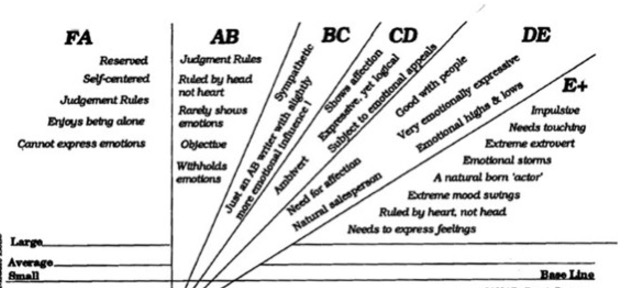
The reason you want to avoid this is because excessively slanted writing is just harder to read. While slanting more will help you write your words and sentences faster, you should definitely sacrifice speed in order to write more legibly and readably.
Day 16: Review What You’ve Learnt so Far
Congratulate yourself: You’re halfway done and 50% closer to your goal of improved handwriting!

At this point, it’s time to conduct the all-important midway review, so you can be sure that you’re still using and making the most of all of these skills you’ve picked up over the last two weeks and more. If you’re still on the right track, then kudos to you. If not, it’s never too late to review and determinedly adopt what you learned in the past 15 days.
Day 17: Avoid Ambiguity: Close the Tops of Your Letters
Handwriting that lacks clarity does no one any good. One of the worst perpetrators of ambiguity is when you fail to completely close the tops of your letters.
When this happens, some letters can quickly begin looking like letters they’re not supposed to—such as “a” and “o” ending up looking like “u.” Be meticulous when you handwrite your letters to improve clarity!
Day 18: Connect Your Letters With Straight Lines Instead of Curves
It’s tempting to lose your form and utilize curved connections between your letters instead of straight ones. When this happens, the letters’ shapes can get muddled, sometimes resulting in illegible handwriting.
Fix this efficiently by simply using straight lines to connect your letters. Straight-line connections make it easier for people to tell your letters apart properly.
Day 19: Get Rid of Tangling
In handwriting, tangles happen when your ascenders and descenders aren’t written properly. The former is the long part of a letter that rises above the bodies of lowercase letters while the latter is the part that descends below the bodies of lowercase letters.

When you make them too long, they’ll get tangled up from one line to the next, so it’s best to keep your ascender and descender length moderate.
Day 20: Be Consistent
Consistency will help you with the aesthetic appearance of your handwriting, as it creates a uniform look and feel to your penmanship.
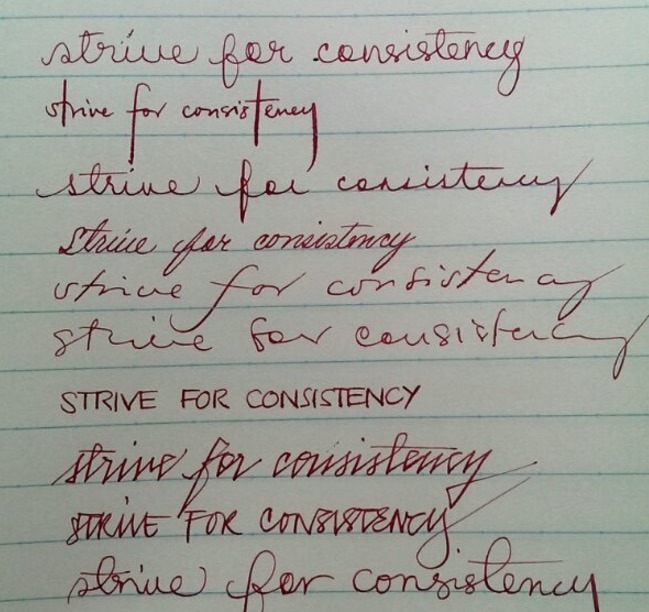
Know that you’ll eventually develop your own, unique handwriting style, so it’s all the more important to keep it consistent, just because it’s easier for people to read. So whether your handwriting ends up being thin, very slanted, or with letters farther apart, ensure consistency in your form.
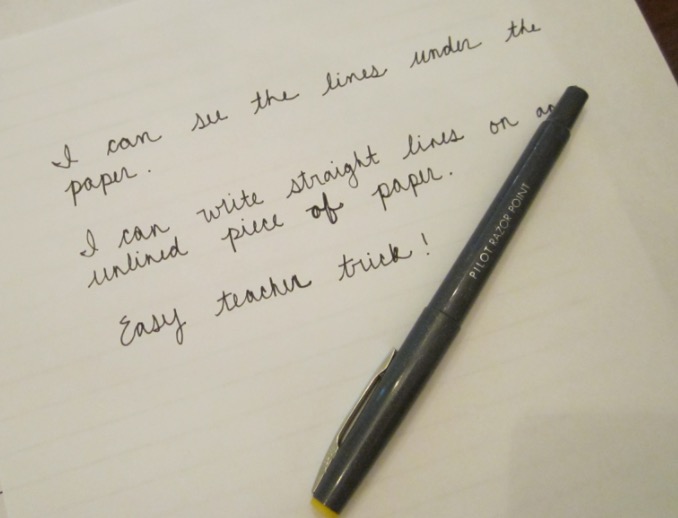
Day 21: Try Various Paper Positions
Even the positioning of your paper can be a big factor in how your handwriting turns out. How you position your paper depends on what your dominant writing hand is.
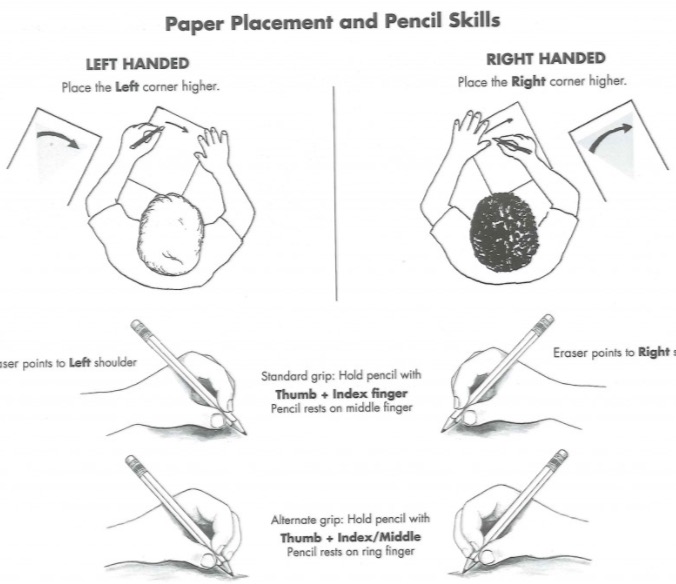
If you’re right-handed, go ahead and use a left-angled or more vertical page position, but if you’re a lefty, you’ll likely benefit from angling your paper more to the right. Whichever position improves your handwriting’s appearance and readability is the right position for your!
Day 22: Write Bigger…at First
The thing is that writing larger letters means they’re easier for you to see. Letters that jump out at you are easier to analyze: If you write bigger, it’ll be easier to spot something wrong in your form or consistency.
When you’re first starting out, make a conscious effort to write slightly bigger letters than normal. When your form and consistency improve—and, thus, your confidence—you can go back to normal letter sizes again.
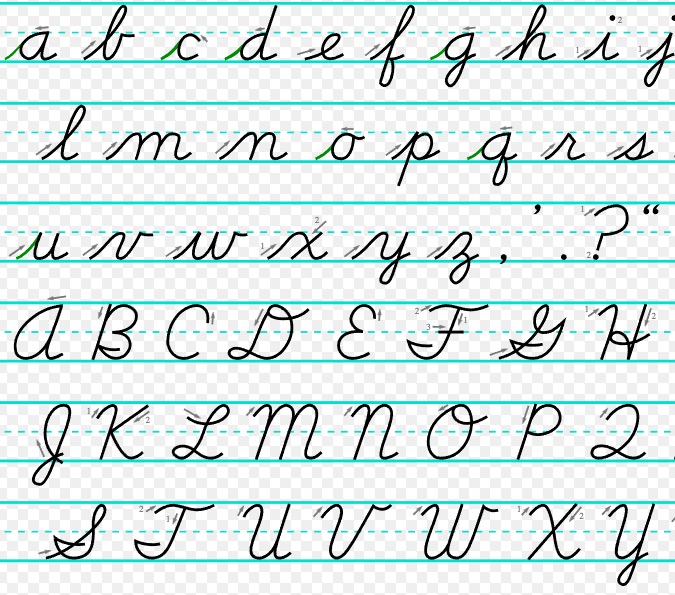
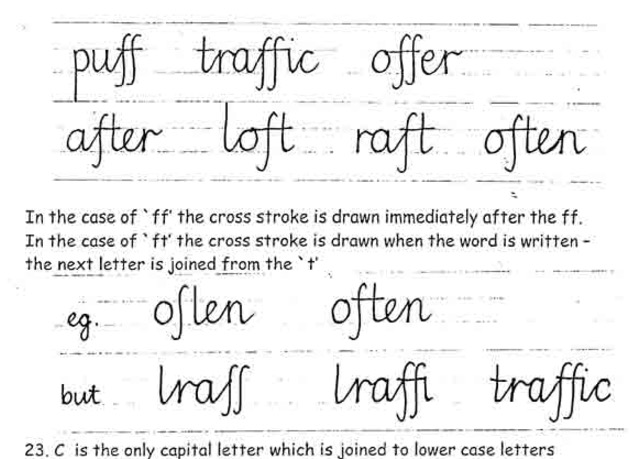
Day 23: Write Each Letter Properly
As we move through adulthood, we forget the basics that we were taught in school, like how to form each letter of the alphabet properly in handwriting. Take the lowercase “a,” for instance.
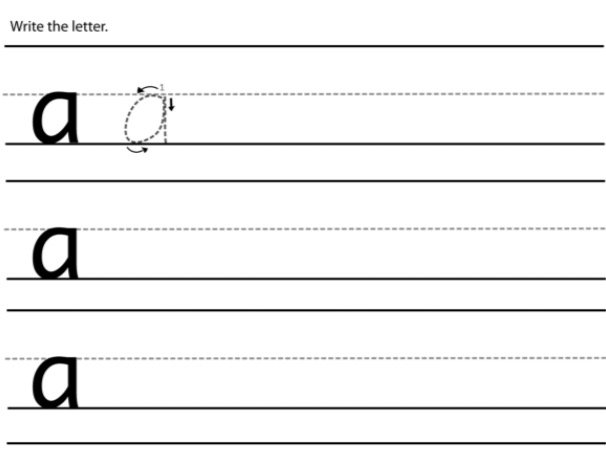
The proper way is to begin from the top of its loop as opposed to the bottom of the letter. When you write each letter properly, you improve everything from legibility to the ease of writing.
Day 24: Refrain From Applying Excessive Pressure
It’s best to keep yourself from applying too much pressure when you’re writing on paper. That’s because too much pressure creates unattractive cursive; in addition, it also makes your hand and wrist hurt!

Save yourself handwriting that’s not aesthetically pleasing and a damaged hand and wrist by writing more airy instead. This means to relax your grip on the pen or pencil in order to create more graceful penmanship on paper.
Traits to Always Practice
Day 25: Purchase a Handwriting Course Book
To keep the handwriting skills sharp that you’ve just learned, it’s important that you’re able to continually apply them. A handwriting course book should have pages after pages of daily exercises that you can try…your hand at, literally.
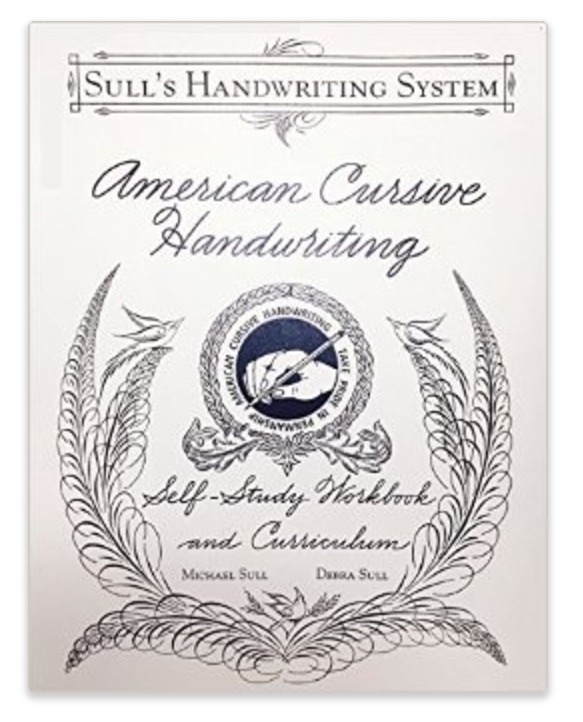
Books like American Cursive Handwriting and Spencerian Penmanship are two of the best books for handwriting instruction and practice.
Day 26: Pace Yourself
When you slow down and pace yourself, your handwriting automatically improves. That’s because you’re preventing yourself from rushing through the formation of your various letters; rushing is often what can lead to errors and sloppy writing that’s hard to read.
Instead, concentrate on making your letters as aesthetic and readable as possible, but to do this, you have to slow down during handwriting. Don’t think of it as a speed contest.
Day 27: Set Aside Some Time for Constant Practice
The old saying that practice makes perfect may be a cliché of sorts, but it’s true, especially in cursive. It’s like when you’re learning to play an instrument: You have to set aside a certain amount of time each day to improve to the point where you’re skillful and great.

The same thing’s true with handwriting. Put aside approximately 15 minutes each day for practice, and you’ll get better more efficiently.
Day 28: Make Handwriting a Daily Part of Your Life
You can get in the habit of handwriting more by actually writing things by hand more in your everyday activities. For instance, instead of journaling electronically on your computer or tablet, permanently switch to a good, old notebook.

Instead of writing an email to your family and friends, write them a traditional, snail-mail letter. When you adopt these habits, they become routine, which helps improve your handwriting more naturally.
Day 29: Copy the Handwriting You Admire
Doing something as basic as copying the handwriting you admire will translate in great leaps and bounds to your handwriting success.

You see, handwriting you admire is impressive because its writer has mastered the finer points of cursive. The more you train yourself in this style, the more your own handwriting will eventually show the same, graceful attributes of the cursive that you currently admire so much.
Day 30: Perform a Handwriting Self-Audit
What’s a handwriting self-audit? It’s the perfect way to wrap up your 30 days to much better cursive. Now that you’re a handwriting master (or at least have very improved cursive), you should periodically check in with yourself to see if you’re still being faithful to each of these tips, tricks and hacks that you’ve picked up over the last month.

The only way to continue to ensure great handwriting is to abide by all these best practices.
You’ve Done It!
Congrats! You’ve passed the 30-day challenge with flying colors. At this point, handwriting should be seamless to you, almost as natural as taking a breath without having to consciously think about it. When you put pen or pencil to paper, your letters should gracefully appear on the paper with mastery and confidence.
If you need just a little bit more handwriting inspiration, though, be sure to head on over to our Creative Market handwriting category, where you’ll get to see thousands and thousands of unique, cursive fonts created by some of the most talented creatives in the industry.

Download now!
Getting started with hand lettering?
Download these worksheets and start practicing with simple instructions and tracing exercises.